
How to Conduct Construction Inspections Effectively
Every construction project, no matter the size, relies on inspections to keep everything safe and up to code. You might expect inspections to be a quick checklist and a walk around the job site. But the truth is, a methodical inspection can actually reduce future maintenance issues by up to 75 percent. Discover how detailed planning and the right tools can make the difference between just passing and truly protecting your project.
Table of Contents
- Step 1: Assess Your Inspection Requirements
- Step 2: Prepare Necessary Inspection Tools
- Step 3: Conduct The Initial Site Evaluation
- Step 4: Perform Detailed Inspections As Required
- Step 5: Document Findings And Recommendations
- Step 6: Review And Finalize Inspection Reports
Quick Summary
| Key Point | Explanation |
|---|---|
| 1. Assess Inspection Requirements Thoroughly | Review all project documents to understand the construction scope and design specifications before starting the inspection. |
| 2. Prepare a Comprehensive Inspection Toolkit | Use professional-grade tools and personal protective equipment to ensure thorough and safe evaluations during inspections. |
| 3. Conduct Systematic Initial Site Evaluations | Perform a detailed perimeter assessment and document conditions to identify risks and verify compliance with design plans. |
| 4. Perform In-Depth Detailed Inspections | Focus on structural integrity and system compliance to prevent future maintenance issues and ensure construction quality. |
| 5. Document Findings with Clarity and Precision | Create detailed reports that include observations, photographic evidence, and actionable recommendations for addressing issues. |
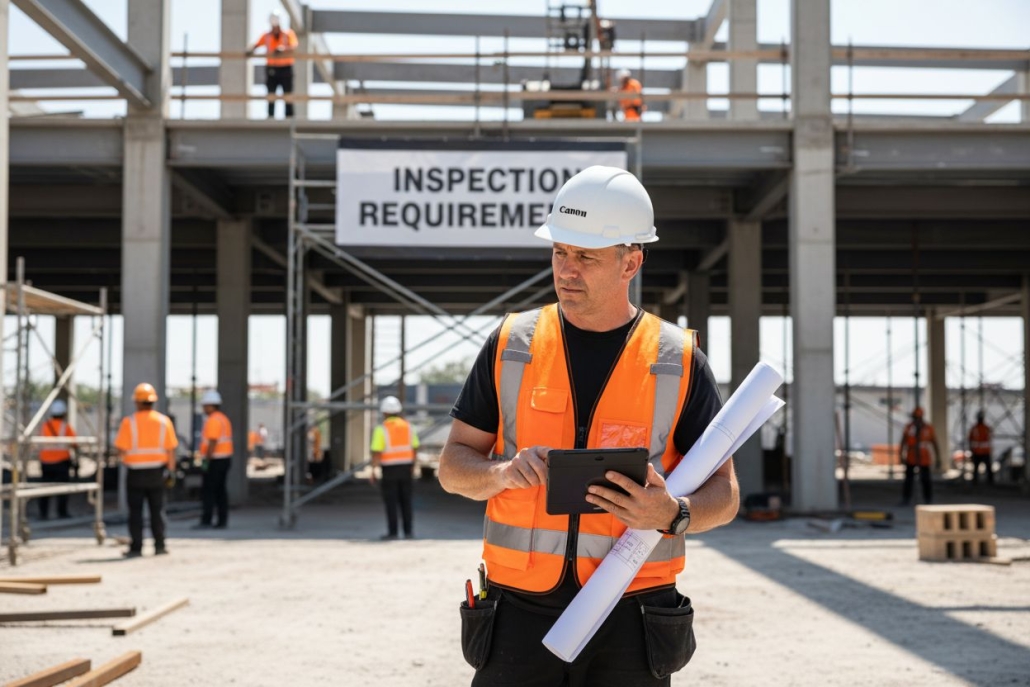
Step 1: Assess Your Inspection Requirements
Conducting a successful construction inspection begins with a comprehensive assessment of your specific inspection requirements. This crucial first step sets the foundation for a thorough and effective evaluation of the construction project. Before stepping onto the job site, you need to gather and understand the complete landscape of what must be examined and verified.
The assessment process involves multiple critical elements that will guide your entire inspection strategy. Start by carefully reviewing all project documentation, including architectural blueprints, engineering specifications, building permits, and original construction plans. These documents provide the essential roadmap for understanding the project’s scope, design requirements, and specific technical standards that must be met.
Carefully examine the project type and complexity as a key determinant of your inspection approach. Residential renovations will require different inspection protocols compared to large commercial construction projects. Consider the specific systems and components that will need detailed evaluation, such as structural integrity, electrical systems, plumbing, mechanical installations, and compliance with local building codes.
According to OSHA Construction Safety Guidelines, comprehensive project documentation and clear inspection objectives are fundamental to ensuring construction safety and quality. Developing a systematic checklist tailored to the specific project will help organize your inspection process. This checklist should include:
- Structural framework verification
- Mechanical and electrical system compliance
- Materials quality assessment
- Code and regulation adherence
- Safety system evaluations
Consult with project stakeholders including architects, contractors, and local building authorities to clarify any ambiguous requirements or potential areas of concern. Understanding their perspectives will help you develop a more comprehensive and targeted inspection strategy. Each construction project presents unique challenges, so flexibility and detailed preparation are key to conducting an effective inspection.
By meticulously assessing your inspection requirements upfront, you establish a solid framework for a methodical and thorough evaluation.
![]() This initial step ensures you are fully prepared to identify potential issues, verify compliance, and contribute to the overall quality and safety of the construction project.
This initial step ensures you are fully prepared to identify potential issues, verify compliance, and contribute to the overall quality and safety of the construction project.
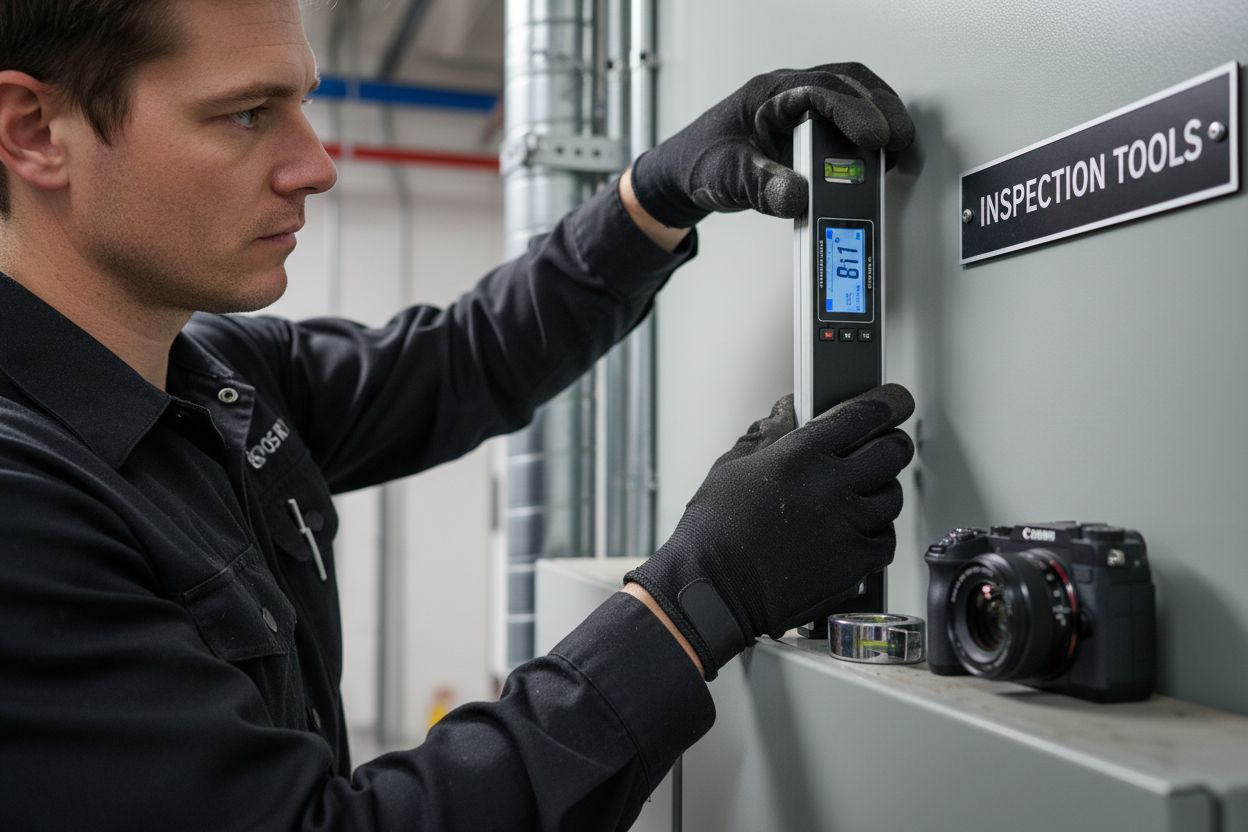
Step 2: Prepare Necessary Inspection Tools
Preparing the right tools for a construction inspection is more than just grabbing a clipboard and a pen. It requires a strategic approach that ensures you can comprehensively assess every aspect of the project with precision and efficiency. Your toolkit will serve as your primary interface for documenting, measuring, and evaluating construction quality and compliance.
Start by selecting professional grade measurement tools that provide accurate readings across various construction parameters. A high quality laser distance meter will help you quickly and precisely measure room dimensions, wall heights, and structural alignments. Digital levels are crucial for verifying horizontal and vertical alignments with millimeter precision. Invest in tools that offer digital readouts and can store measurement data, which streamlines your documentation process.
Personal protective equipment forms another critical component of your inspection toolkit. Safety should always be your primary consideration. This means selecting sturdy hard hats, protective eyewear, steel toed boots, high visibility vests, and work gloves that provide both protection and dexterity. Your protective gear not only keeps you safe but also demonstrates professional preparedness to project stakeholders.
According to Construction Safety Equipment Guidelines, proper personal protective equipment is essential for maintaining workplace safety during inspections. Your comprehensive inspection toolkit should include:
- Laser distance meter
- Digital level
- High resolution digital camera
- Thermal imaging camera
- Moisture meter
- Tablet or rugged laptop for digital documentation
- Clipboard with waterproof paper
- Multiple measuring tapes
- Flashlight with extra batteries
- Portable power bank
Digital documentation tools have revolutionized construction inspections. A tablet or rugged laptop with specialized inspection software allows you to create digital reports, annotate images, and instantly share findings with project managers. Pair this with a high resolution digital camera capable of capturing detailed images that can document potential issues or serve as visual evidence in your reports.
Remember that your tools are an extension of your professional expertise. Regularly calibrate measurement devices, maintain your equipment, and stay updated on the latest technological advancements in inspection tools. A well prepared inspector with a comprehensive toolkit can transform a routine inspection into a precise, thorough evaluation of construction quality and compliance.
Below is a table summarizing essential tools and personal protective equipment to prepare for construction inspections, along with their primary purposes.
| Tool/Equipment | Purpose |
|---|---|
| Laser distance meter | Accurately measure room dimensions and structural alignments |
| Digital level | Verify horizontal and vertical alignments with high precision |
| High resolution digital camera | Capture detailed images for documentation and evidence |
| Thermal imaging camera | Detect insulation gaps, electrical hotspots, and moisture issues |
| Moisture meter | Measure and identify potential moisture intrusion |
| Tablet or rugged laptop | Digital documentation, reporting, and real-time data sharing |
| Clipboard with waterproof paper | Manual documentation in harsh site conditions |
| Measuring tapes (multiple) | Quick, manual measurement across various site areas |
| Flashlight with extra batteries | Illuminate dark or low-light areas for thorough inspection |
| Portable power bank | Ensure electronic devices remain charged throughout the inspection |
| Hard hat, gloves, vest, boots | Provide safety and meet PPE standards during site evaluations |
Step 3: Conduct the Initial Site Evaluation
The initial site evaluation represents a critical phase in the construction inspection process where you transition from preparation to active assessment. This step demands a systematic and observant approach that goes beyond merely walking through the construction site. Your goal is to develop a comprehensive understanding of the project’s current status, potential challenges, and overall compliance with design specifications and building codes.
Begin your site evaluation by conducting a perimeter assessment, carefully examining the external boundaries and immediate surrounding environment. Look for potential drainage issues, ground stability, and any external factors that might impact construction quality. Assess how the site’s topography and existing conditions align with the original architectural and engineering plans. Note any discrepancies between the planned design and the actual site conditions that could pose challenges during construction.
Move systematically through the construction site, starting from the foundation and progressing upward. Use your laser distance meter and digital level to verify structural alignments, checking that foundational elements are level, square, and positioned precisely according to the project blueprints. Pay special attention to critical connection points, potential stress areas, and zones that require exceptional structural integrity.
According to Construction Safety and Inspection Research, a methodical approach to initial site evaluation can prevent up to 60% of potential construction defects. During your evaluation, document everything meticulously. Your documentation should capture not just measurements and observations, but potential risks, deviations from plans, and areas requiring further investigation.
Your initial site evaluation checklist should include:
- Foundation and ground preparation verification
- Structural alignment measurements
- Material quality assessment
- Potential environmental impact evaluation
- Preliminary safety hazard identification
- Comparison with original architectural plans
Photographic and digital documentation will serve as crucial evidence and reference points for future stages of the inspection. Use your high resolution camera to capture detailed images of key areas, potential issues, and overall site conditions. Ensure your images are time stamped and include contextual information that will help stakeholders understand the precise location and nature of your observations.
Remember that an effective initial site evaluation is about more than just technical measurements. It requires a holistic perspective that combines technical expertise, keen observation, and a proactive approach to identifying potential challenges before they become significant problems. Your goal is to provide a comprehensive snapshot of the construction site’s current status and potential future considerations.
Step 4: Perform Detailed Inspections as Required
Detailed inspections represent the core of construction quality assurance, transforming your initial site evaluation into a comprehensive technical assessment. This step requires a methodical approach that goes beyond surface level observations, diving deep into the intricate systems and structural components that define the construction project’s integrity and compliance.
Structural inspections form the foundational element of your detailed evaluation process. Begin by systematically examining load bearing walls, support structures, and connection points. Use your digital level and thermal imaging camera to detect potential structural anomalies that might not be visible through traditional visual inspection. Look for subtle signs of stress, misalignment, or potential material fatigue that could compromise the building’s long term stability.
Transition methodically through mechanical, electrical, and plumbing systems, understanding that each represents a complex network requiring precise verification. Your thermal imaging camera becomes an invaluable tool during this phase, allowing you to identify potential electrical hotspots, detect insulation gaps, and reveal hidden moisture intrusion points that traditional visual inspections might miss. Verify that all installations meet current building codes and manufacturer specifications, paying close attention to safety protocols and potential risk factors.
According to National Institute of Building Sciences, comprehensive system inspections can prevent up to 75% of potential future maintenance issues. Your detailed inspection should encompass:
- Structural integrity verification
- Electrical system compliance
- Mechanical system functionality
- Plumbing network assessment
- Material quality evaluation
- Safety system verification
Utilize your digital documentation tools to create comprehensive reports that not only identify issues but provide actionable recommendations. Capture high resolution images that clearly demonstrate any discovered irregularities, ensuring that your documentation serves as a clear communication tool for contractors, architects, and project managers.
Remember that detailed inspections are not about finding fault but about ensuring quality, safety, and long term performance. Your professional approach should balance technical precision with constructive feedback. Each observation should be presented as an opportunity for improvement rather than a criticism, helping project stakeholders understand potential enhancements to the construction process.
Conduct your detailed inspections with patience, thoroughness, and a commitment to maintaining the highest standards of construction quality. Your expertise and attention to detail will directly contribute to the project’s ultimate success and longevity.
This table provides a checklist overview of the core areas to verify during a detailed construction inspection, summarizing the main focus and typical verification methods for each component.
| Inspection Area | Main Focus | Typical Verification Method |
|---|---|---|
| Structural integrity | Load-bearing elements, alignment, support | Visual checks, digital level, measurements |
| Electrical system | Code compliance, safety, installation quality | Visual checks, thermal imaging, code review |
| Mechanical system | Functionality, installation standards | Operational tests, specification checks |
| Plumbing network | Leak detection, correct installation | Visual checks, moisture measurement |
| Material quality | Durability, suitability for design requirements | Physical inspection, documentation |
| Safety system | Fire exits, alarms, hazard control features | Physical tests, visual verification |
Step 5: Document Findings and Recommendations
Documenting construction inspection findings transforms your technical observations into a valuable strategic resource for project stakeholders. This critical step requires precision, clarity, and a comprehensive approach that goes beyond simply recording problems. Your documentation serves as an official record that can guide future improvements, ensure compliance, and protect all parties involved in the construction process.
Create a systematic documentation framework that organizes your findings with professional clarity. Begin by developing a standardized reporting template that allows for consistent, detailed recording of observations. Your report should include precise location references, detailed descriptions of findings, photographic evidence, and specific recommendations for addressing any identified issues. Digital documentation tools enable you to create comprehensive reports that can be easily shared and referenced by project managers, contractors, and regulatory authorities.
Photographic documentation becomes a powerful communication tool during this stage. Ensure your images are high resolution, clearly labeled, and include contextual information that helps viewers understand the exact nature and location of observed conditions. Use your digital camera to capture multiple angles of potential issues, providing a complete visual representation of your findings. Annotate images with measurement data, date stamps, and specific observations that highlight the technical details of your inspection.
According to Construction Documentation Guidelines, comprehensive reporting is essential for maintaining project transparency and safety. Your documentation should include:
- Precise location of findings
- Detailed photographic evidence
- Specific compliance issues
- Recommended corrective actions
- Potential safety implications
- Estimated resolution timelines
Develop a clear recommendation framework that transforms identified issues into actionable insights. Instead of merely pointing out problems, provide constructive guidance that helps project stakeholders understand the significance of each finding and the most effective approach to resolution. Your recommendations should be specific, technically sound, and presented in a manner that facilitates practical implementation.
Remember that effective documentation is about more than just recording issues. It represents a professional communication tool that bridges technical observations with practical solutions. Your reports should demonstrate expertise, attention to detail, and a commitment to supporting the project’s overall success. Approach each documentation effort as an opportunity to provide valuable insights that can improve construction quality, safety, and long term performance.
Step 6: Review and Finalize Inspection Reports
The final stage of the construction inspection process demands meticulous attention to detail and a comprehensive review that transforms your raw observations into a professional, actionable document. This step is not merely about proofreading but about creating a definitive report that will guide future construction decisions and serve as an official record of the project’s technical assessment.
Begin your review process by conducting a systematic cross verification of all documented findings. Compare your field notes, digital photographs, measurement data, and initial observations to ensure complete consistency and accuracy. Look for potential gaps in documentation, verify that all critical areas have been thoroughly examined, and confirm that your recommendations are technically sound and practically implementable. This comprehensive review eliminates potential ambiguities and strengthens the credibility of your inspection report.
Technical language requires precision and clarity. Carefully review each section of your report to ensure that descriptions are technically accurate, concise, and easily understood by various stakeholders including contractors, project managers, and regulatory officials. Eliminate industry jargon that might create confusion, replacing complex terminology with clear, direct explanations that communicate the essence of your findings without sacrificing technical integrity.
According to Construction Reporting Standards, a well structured final report should provide comprehensive insight into project conditions. Your finalization process should include:
- Complete cross verification of all observations
- Technical language refinement
- Photographic evidence validation
- Recommendation clarity assessment
- Compliance standard alignment
- Professional formatting review
Pay special attention to the formatting and presentation of your final report. Use a consistent, professional template that includes clear section headings, clean typography, and a logical flow of information. Ensure that your digital files are properly labeled, easily shareable, and compatible with various document management systems used by construction professionals.
Remember that your inspection report is more than a technical document. It represents your professional expertise and serves as a critical communication tool that can significantly impact the project’s future. Approach the finalization process with the same level of precision and dedication you applied during the initial site inspection. A meticulously prepared report demonstrates your commitment to quality, safety, and professional excellence in construction inspection.
Unlock Quality and Confidence in Every Construction Inspection
Are you feeling overwhelmed by the complexity of construction inspections? Whether you struggle with understanding local codes, documenting findings, or ensuring that every phase of your project is up to standard, the challenges described in our guide are real and costly. With so much focus on precise documentation, technical assessments, and safety protocols, you cannot afford shortcuts on structural, electrical, or mechanical oversight. Our expertise bridges these gaps. Visit our Florida Licensed Engineers team to support your residential or commercial inspection needs with clarity and reliability. If you are looking for expert solutions and more insights, check the Uncategorized Archives – Georgial Licensed Engineers for additional perspectives relevant to your region.

Ensure your next inspection is thorough and compliant. Schedule a consultation on Florida Licensed Engineers now and gain immediate access to engineering services, blueprints, permitting support, and comprehensive reporting. Make your inspections a source of confidence—not uncertainty. Take action today for safer, code-compliant results and get your project on the right track.
Frequently Asked Questions
How do I assess my inspection requirements for construction projects?
To assess your inspection requirements effectively, start by reviewing all project documentation, including architectural blueprints and engineering specifications. Create a systematic checklist that outlines the key areas you need to evaluate, such as structural integrity and code compliance, to guide your inspection process.
What tools are essential for conducting effective construction inspections?
Essential tools for effective construction inspections include a laser distance meter, digital level, and personal protective equipment, such as hard hats and safety vests. Prepare a comprehensive toolkit that ensures you can accurately measure and evaluate every aspect of the project.
How should I document my findings during a construction inspection?
To document your findings, develop a standardized reporting template that includes precise location references and photographic evidence of your observations. Ensure that your reports clearly outline recommended corrective actions and any compliance issues to enhance clarity for project stakeholders.
What steps should I follow during the initial site evaluation?
During the initial site evaluation, begin with a perimeter assessment to identify any external factors that may affect construction quality. Systematically proceed through the site, verifying structural alignments and documenting any discrepancies against the project plans to prevent potential future issues.
How do I finalize my inspection reports effectively?
To finalize your inspection reports effectively, begin by cross-verifying all documented findings for consistency and accuracy. Review each section for clarity and technical precision, ensuring that your formatting is professional and easily interpretable for all stakeholders involved in the project.
Recommended
- Construction Administration | Residential & Commercial | QuiBuilder
- Services – quibuilder
- region – Colorado Licensed Engineers
- Region – Connecticut Licensed Engineers
- 11-Month Warranty Inspection for New Construction Homes
- 8 Langkah Mudah Bina Rumah Impian Atas Tanah Sendiri di Selangor: Panduan Lengkap untuk Pemilik Tanah Baru! | RumahHQ – Kontraktor Bina & Renovate Rumah


